I am really enjoying the blogging process, BTW. It's great to share the positive experiences I come upon while teaching. But...one thing is missing. YOUR COMMENTS:) Please tell me what's on your mind! Or just say hello. Or whatever! Better yet, follow the blog AND comment! Ya' know, in between lesson planning, hanging artwork, and teaching...
Anywho,I just spent the BEST Saturday ever (well a close second, my wedding will be on a Saturday this summer, hopefully that will rock too!) at the Cleveland Institute of Art taking part in their
BASIC workshop... For a mere $50 I got to hang out with ART TEACHERS from the area was fed breakfast, lunch and wine/cheese! and learned about low relief tiles from one of CIA's finest:) How cool is that?! I met some great people, got to swap stories and make art on my day off. I was really in 7th heaven. Here are a couple pix, I am kicking myself that I didn't bring my camera to document the process!
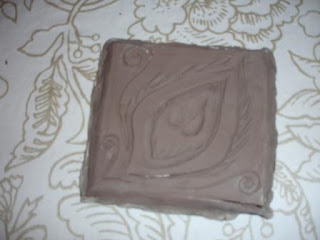
The original clay tile.

The negative impression left once my tile popped out. This sucker is HEAVY. solid plaster!
The instructor,
Amy, and Val were great, super approachable and down to earth! Amy even offered to help me with firing up my kiln (I am a wee bit nervous of burning the school down).
I think the process of making low relief tiles in volume from a mold would really be a great set of skills for an upper level high school art class...Basically, you make a sandwich of 3 (ish) layers of clay : cutting into the clay exposing the lower layers to create a relief design. Then you pour a plaster mold around it and pull the sandwich o'clay out reusing the mold for as many clay tiles as you care to pop out! I didn't exactly follow the format of the layers, instead I did more carving. Amy recommended the book
Handmade Tiles by Frank Georgini for detailed information on the process.
Learned some tips for mold making and plaster pouring for sure! I can't wait to attend the next workshop:)

 We used phonetics to help us remember what a tint was and what a shade was... tint and white both have "i" as the vowel, shade and black both have "a".
 I originally adapted this from a dick blick lesson plan but eliminated/substituted the fancy-dancy materials for what I had...small pieces of cardstock donated by a local print shop (for the background) and tempera paint instead of acrylic!


